
One of the most common mistakes retail traders make is trading against strength.
They buy weak currencies.
They sell strong currencies.
And they wonder why price keeps moving against them.
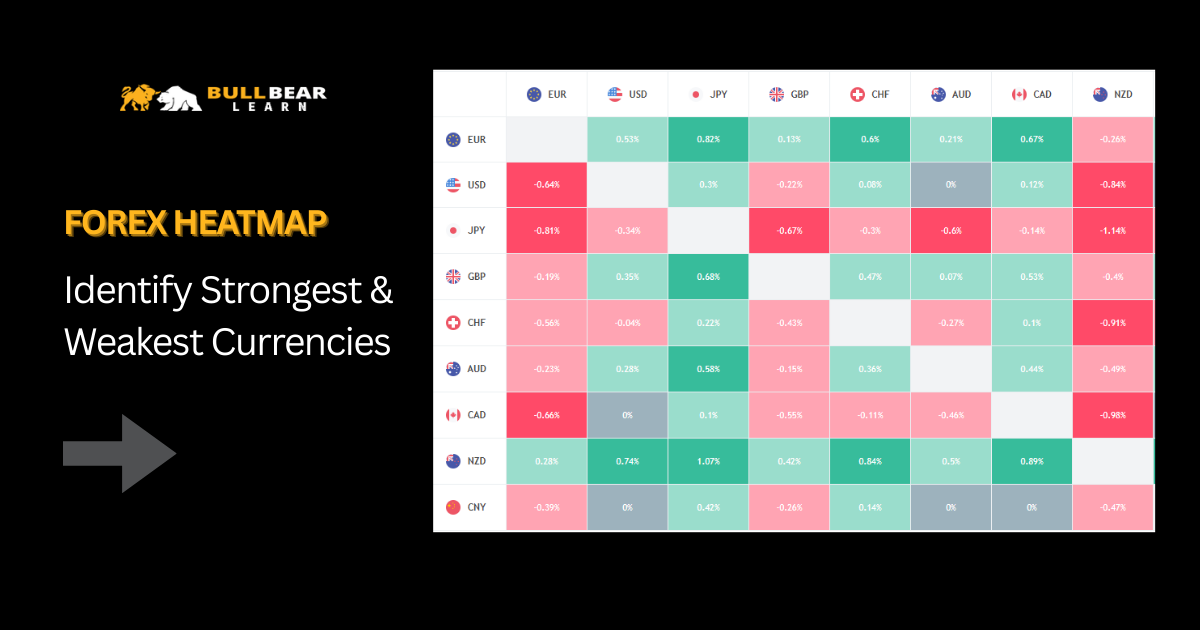
A Forex Heatmap solves this problem by showing, at a glance, which currencies are strong and which are weak across the market.
Instead of guessing direction, you trade with relative strength and market flow.
What Is a Forex Heatmap?
A Forex Heatmap is a visual tool that displays the relative performance of currencies over a selected time period.
It compares:
-
One currency against all others
-
Across multiple timeframes
-
Using color-coded strength metrics
Typically:
-
Green = Strength
-
Red = Weakness
The deeper the color, the stronger the momentum.
📌 This allows traders to identify the best currency pairs to trade instantly.
Why Currency Strength Matters in Forex
Forex trading is always relative:
-
You buy one currency
-
You sell another
Therefore, the highest-probability trades occur when you:
-
Buy the strongest currency
-
Sell the weakest currency
This creates natural directional bias.
Without a heatmap, traders often:
-
Trade random pairs
-
Ignore market-wide strength
-
Enter low-quality setups
How a Forex Heatmap Works
The heatmap aggregates data from:
-
Price movement
-
Percentage change
-
Momentum over time
Then it ranks currencies based on:
-
Relative performance
-
Across the entire forex market
Instead of analyzing 28+ pairs manually, the heatmap does the work for you in seconds.
How to Read a Forex Heatmap
Strong Currency
-
Consistently green
-
Outperforming most other currencies
-
Suitable for BUY setups
Weak Currency
-
Consistently red
-
Underperforming across pairs
-
Suitable for SELL setups
Neutral Currency
-
Mixed colors
-
No clear directional edge
📌 Strong vs Weak = Trade Opportunity
Example – Using the Forex Heatmap
Assume the heatmap shows:
-
USD: Strong (green across pairs)
-
JPY: Weak (red across pairs)
High-probability pair:
-
USDJPY BUY
Low-probability pair:
-
EURGBP (both neutral)
The heatmap helps you filter trades before technical analysis even begins.
Forex Heatmap vs Indicators
| Tool | Purpose |
|---|---|
| Indicators | Entry signals |
| Price Action | Structure & timing |
| Forex Heatmap | Pair selection & bias |
The heatmap does not replace technical analysis — it guides it.
Best Timeframes for Using a Heatmap
Intraday Traders
-
15m – 1H heatmap
-
Trade momentum sessions
Day Traders
-
1H – 4H heatmap
-
Align with session trends
Swing Traders
-
Daily – Weekly heatmap
-
Capture macro strength
📌 Timeframe alignment increases probability.
Forex Heatmap and Trading Psychology
The heatmap removes:
-
Overthinking
-
Analysis paralysis
-
Emotional pair selection
Instead of asking:
“Which pair should I trade?”
You ask:
“How do I trade the strongest vs weakest pair correctly?”
This is a professional mindset shift.
Common Mistakes When Using a Forex Heatmap
❌ Trading heatmap alone without confirmation
❌ Ignoring higher-timeframe strength
❌ Chasing late momentum
❌ Using heatmap during major news without caution
The heatmap is a directional filter, not an entry signal.
Combining Forex Heatmap with Other Tools
Best workflow:
-
Identify strength & weakness → Forex Heatmap
-
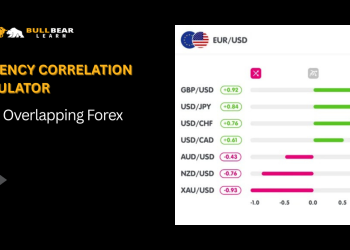
Check correlation →
/tools/currency-correlation/ -
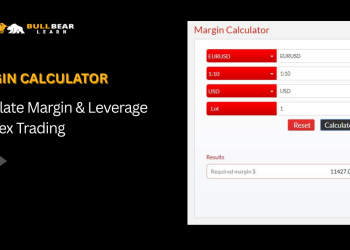
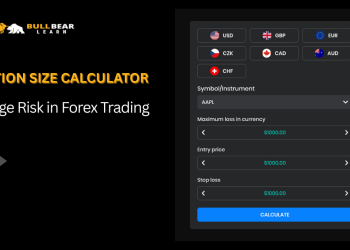
Calculate risk →
/tools/position-size-calculator/ -
Validate reward →
/tools/profit-calculator/
📌 This creates a professional pre-trade checklist.
Who Should Use a Forex Heatmap?
✔ Beginners (pair selection guidance)
✔ Scalpers (session momentum)
✔ Day traders (trend alignment)
✔ Swing traders (macro bias)
✔ Prop firm traders
If you trade multiple pairs, this tool is essential.
Why Our Forex Heatmap Tool Is Different
-
Real-time updates
-
Clear strength ranking
-
Multiple timeframe views
-
Clean visual design
-
No indicator clutter
It is built to answer one critical question:
What should I trade right now?
Final Thoughts
The Forex Heatmap helps traders stop fighting the market and start flowing with it.
Strong currencies tend to get stronger.
Weak currencies tend to get weaker.
Trading with strength is not optional — it is professional discipline.


